Renovating your bathroom can transform not just the look of this space but also its functionality and value.
One of the most impactful changes you can make is updating your flooring, and what better way to do this than with ceramic tiles?
Durable, water-resistant, and available in a myriad of designs, ceramic tiles offer both aesthetic and practical benefits that are hard to beat.
This guide is tailored specifically for homeowners in Ireland, from beginners to those with a bit of DIY experience, looking to refresh their bathroom with new tiles.
Whether you’re planning a full bathroom makeover or simply updating the floor, laying ceramic tiles can seem daunting.
However, with the right tools, a bit of preparation, and Ceramic City’s step-by-step guide, you’ll find that not only is it achievable, but it can also be a satisfying DIY project.
If you want to take some ceramic tiles up from the floor without breaking them, this blog will help.
Materials and Tools Needed
So, before you start laying tiles, it might you be useful to know the diferences between ceramic and porcelain tiles.
Before diving into the tiling process, gathering all necessary materials and tools is crucial.
Having everything on hand will streamline your workflow and ensure you don’t have to pause mid-project.
Here’s what you’ll need:
Materials:
- Ceramic Tiles: Choose tiles that complement your bathroom’s aesthetic and meet your durability needs. Ceramic City has the best range in Ireland.
- Mortar (Thinset): A special adhesive to secure the tiles to the floor.
- Grout: To fill in the spaces between the tiles. Available in various colors to match or contrast with your tiles.
- Spacers: These little helpers ensure uniform gaps between tiles for a professional look.
Tools:
- Notched Trowel: For applying the mortar in an even layer.
- Tile Cutter: For cutting tiles to the right size. Depending on your tile material and project complexity, you might need a manual cutter or a wet saw.
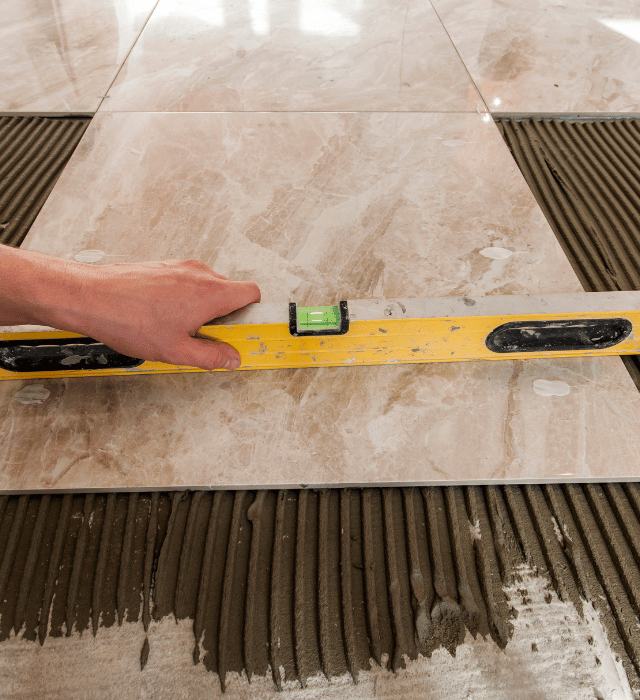
- Level: To ensure your tiles lay flat and even across the floor.
- Rubber Mallet and Sponge: For setting tiles and cleaning as you go.
Preparing your workspace with these materials and tools will make the installation process smoother and more efficient.
Remember, the quality of your tools can significantly impact the ease of installation and the final look of your tiled floor.
Preparation: Getting Your Bathroom Ready for Tile Installation
A successful tiling project starts with thorough preparation.
Fail to prepare and prepare to fail and all that.
Here’s how to prepare your bathroom floor for ceramic tiles:
- Clean the Floor: Ensure the surface is free from dust, debris, and any old flooring materials. A clean surface will help the mortar adhere better.
- Check for Levelness: Use a level to check the floor. Any significant dips or rises can lead to cracked tiles down the line. If necessary, apply a self-leveling underlayment to even out the floor.
- Install Backer Board (for Wooden Subfloors): If your bathroom has a wooden subfloor, laying a cement backer board is essential to prevent moisture damage and provide a sturdy base for the tiles. Measure and cut the backer board to fit your bathroom floor, then secure it with screws. Remember to leave a slight gap between the boards and along the walls to allow for expansion.
- Apply a Waterproofing Membrane (Optional): In wet areas, a waterproofing membrane over the backer board can provide additional moisture protection. This step is especially recommended for bathrooms with a high level of moisture exposure.
By following these preparation steps, you’re setting the stage for a smooth and durable tile installation.
The extra effort now will save you time and ensure a beautiful result that lasts for years to come.
Next step is to pick your tiles.
In this blog we’ve picked out the most popular bathroom tiles for 2024.
Step by Step: How to put Ceramic Tile on Bathroom Floor
Step 1: Planning Your Layout
Before mixing any mortar, it’s essential to plan your tile layout.
A good layout is key to a professional-looking finish.
- Find the Center: Identify the center of your bathroom floor. This is where you’ll start laying your tiles to ensure an even layout.
- Dry Lay Tiles: Arrange your tiles on the floor without mortar to preview the layout. This step helps you avoid small cuts at the room’s edges.
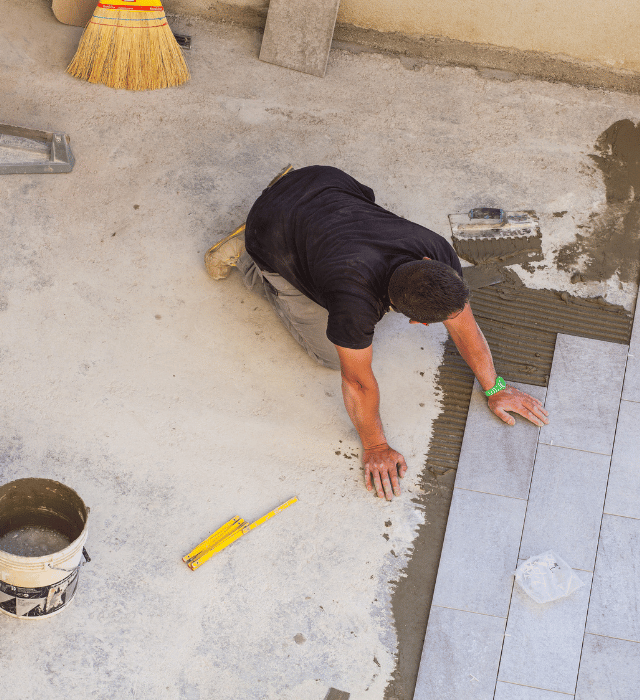
Step 2: Mixing and Applying Mortar
Now that you’ve planned your layout, it’s time to mix the mortar.
- Mix Mortar: Follow the manufacturer’s instructions to mix your thinset mortar to the right consistency.
- Apply Mortar: Using a notched trowel, apply mortar to the floor, starting at the center. The notches help ensure an even coat that’s the right thickness. This blog will tell you more on how to correctly trowel the mortar.
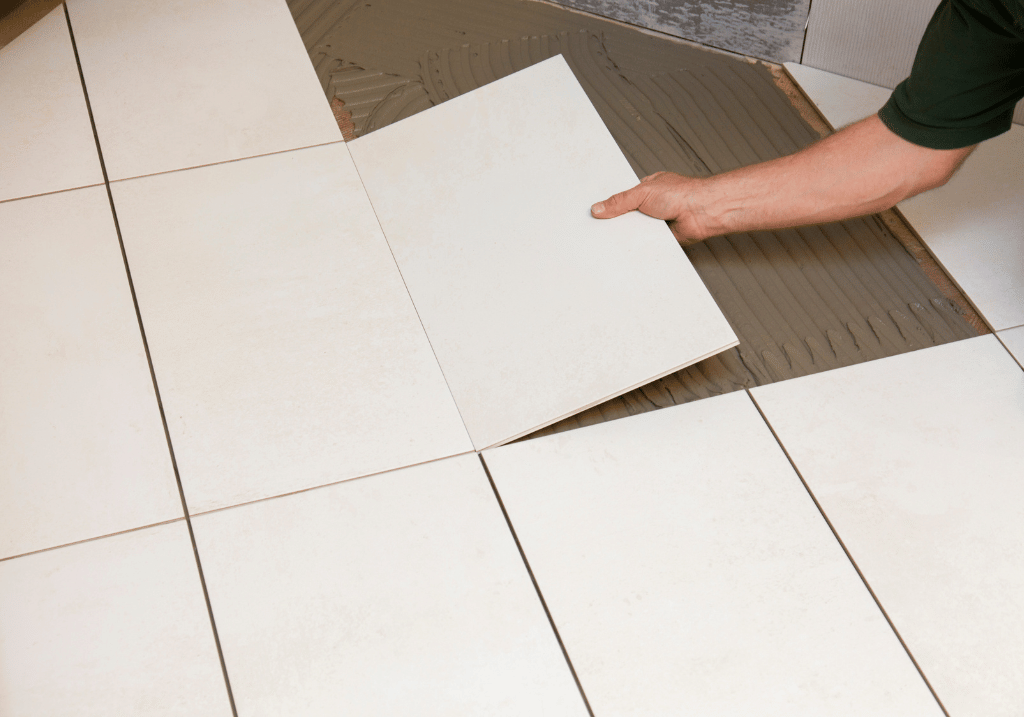
Step 3: Laying the Tiles
With your mortar ready, begin laying the tiles.
- Lay the First Tile: Place your first tile at the center point, pressing down firmly and twisting slightly to ensure good adhesion.
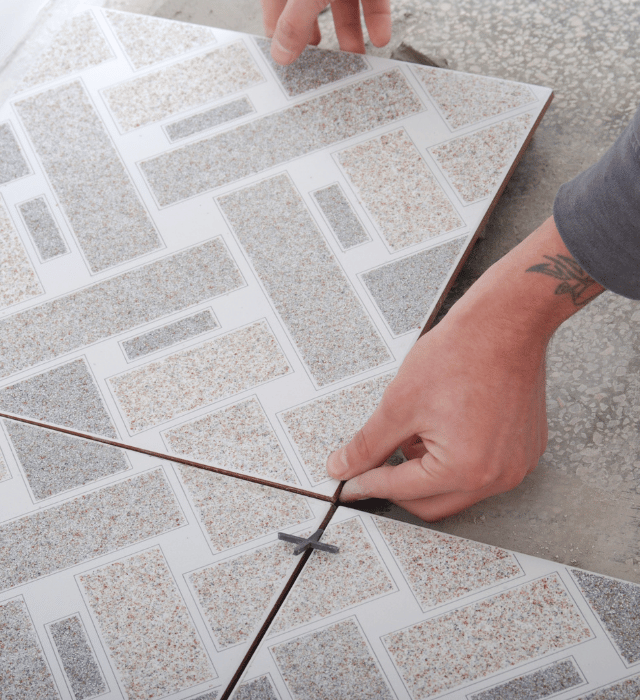
- Insert Spacers: Place spacers around the tile to ensure even gaps for grout.
- Continue Laying Tiles: Work your way out from the center, applying mortar and laying tiles in sections.

Step 4: Cutting Tiles to Fit
Not all tiles will fit perfectly.
You’ll likely need to cut tiles to fit around the room’s edges or fixtures.
This blog delves deeper into how to cut a ceramic tile and the different methods.
- Measure and Mark: Measure the space for the cut tile and mark your tile accordingly.
- Use a Tile Cutter: For straight cuts, use a tile cutter. For more complex cuts, a wet saw is recommended. This blog will share some different ways of cutting ceramic tiles.
Step 5: Applying Grout
After the mortar has set and the tiles are firmly in place, it’s time to apply the grout.
- Mix the Grout: According to the package’s instructions, mix your grout.
- Apply Grout: Use a rubber float to press grout into the spaces between the tiles. Wipe away excess grout with a damp sponge.
Finishing Touches
Once the grout has dried, apply a sealant to protect your new floor from moisture and stains.
Conclusion: Enjoy Your Newly Tiled Bathroom Floor
Congratulations! You’ve successfully navigated the process of laying ceramic tiles on your bathroom floor.
What was once a daunting project is now a beautiful reality, transforming your space with a touch of elegance and durability.
You might have surprised yourself with your DIY skills too!
Remember, the key to a successful tiling project lies in careful planning, precision, and patience.
By following the steps outlined in this guide, you’ve added significant value to your home and created a space that reflects your style and craftsmanship.
We’d love to see your tiling projects and hear about your experiences.
Share your stories and photos with us on social media and inspire others to embark on their renovation journeys. If you’re looking for more renovation tips or the perfect tiles for your next project, visit Ceramic City’s website and explore our extensive collection of bathroom tiles.